Installing peel & stick wallpaper is one of the easiest and most rewarding DIY projects — but perfect results depend on proper preparation.
Even the best wallpaper won’t adhere well to a dusty, uneven, or freshly painted wall.
Here’s your step-by-step checklist to get your surface ready for a smooth, bubble-free installation that looks professionally done.
1. Start with a Clean Surface
Dust, grease, and residue are the most common causes of poor adhesion.
Before you begin, wipe the entire wall with a damp cloth and a few drops of mild dish soap. Rinse with clean water and let it dry completely.
✨ Tip: Avoid using cleaners that contain oil or silicone — they can leave a film that prevents the adhesive from sticking properly.
2. Check for Texture and Imperfections
Peel & stick wallpaper performs best on smooth, non-porous surfaces.
If your wall has texture, lightly sand the area with fine-grit sandpaper until it feels even to the touch.
Fill small holes or dents with spackling paste, then sand again once it’s dry. The smoother the wall, the smoother the final look.
3. Wait for Paint to Cure
If your wall has been freshly painted, give it time to cure before applying wallpaper — typically at least 4 weeks.
Even if the surface feels dry, the paint underneath may still be releasing moisture, which can cause bubbles or peeling later.
4. Test Adhesion Before Committing
Every wall behaves a little differently depending on paint type and finish.
Cut a small piece of wallpaper and stick it to your wall for 24–48 hours.
If it adheres firmly and removes cleanly, you’re good to go.
If not, a quick wipe with isopropyl alcohol can help remove any invisible residue before reinstalling.
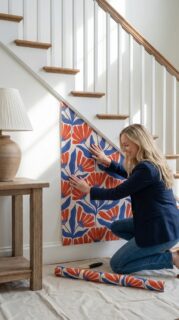
5. Measure and Mark
Before peeling any backing, measure your wall height and width.
Use a level or laser guide to mark a light vertical line as your starting point — this ensures your first panel goes on straight, which is crucial for aligning the rest.
Remember: walls are rarely perfectly square, so a precise starting line will save you frustration later.
6. Control Temperature and Humidity
Room conditions matter. For best results, apply wallpaper in a room that’s between 18°C and 25°C (65°F–77°F) with low humidity.
Avoid installing right after a shower, near a heat source, or when the room is very cold — adhesives perform best in stable environments.
7. Gather Your Tools
A few simple tools make installation smoother:
- Utility knife or sharp scissors
- Plastic smoother or squeegee
- Measuring tape
- Pencil or chalk
- Step ladder
Having everything ready before you start means less interruption and fewer alignment mistakes.
8. Final Check Before You Begin
- ✔ The wall is clean and dry
- ✔ Holes and bumps are filled and sanded
- ✔ Paint has cured for at least 4 weeks
- ✔ Adhesion test was successful
- ✔ Temperature is stable
- ✔ Tools are ready
Now you’re set for an easy, flawless install.
Final Thought
Great wallpaper starts with great prep. Taking the time to properly clean, measure, and test your surface ensures your peel & stick wallpaper not only looks beautiful — it lasts.
✨ Ready for the next step? Check out our installation guide: “How to Install Peel & Stick Wallpaper Like a Pro.”